


Who said every treatment must be done at the salon? Imagine a random humid morning: your hair looks smooth and in place, and a few hours later, you've lost curl definition and frizz has taken over. If that experience is familiar, then an at home keratin treatment is the solution.
The truth is, a once-a-while keratin treatment at home does far more than a regular conditioning treatment. You only need the right products, proper application process, and a little bit of patience to achieve salon-worthy results right from your home.
What Is an At Home Keratin Treatment?
An at home keratin treatment isn't just a keratin treatment done at home. It is designed to smooth the hair and most especially, it's formulated for use at home. Although hair keratin treatments at the salon are done by professionals, the best at home keratin treatment bottle is formulated to make each ingredient do what it's meant to. To understand better how these treatments work, let's know a little about keratin itself.
What's Keratin?
Keratin is that natural protein in the hair, skin and nails. It is part of what protects your hair strands so that it remains strong, smooth and resilient to harsh environmental conditions and manipulation when styling. But the International Journal of Cosmetic Science confirms that repeated heat and UV exposure disrupts the bond that holds the hair's keratin structure together.
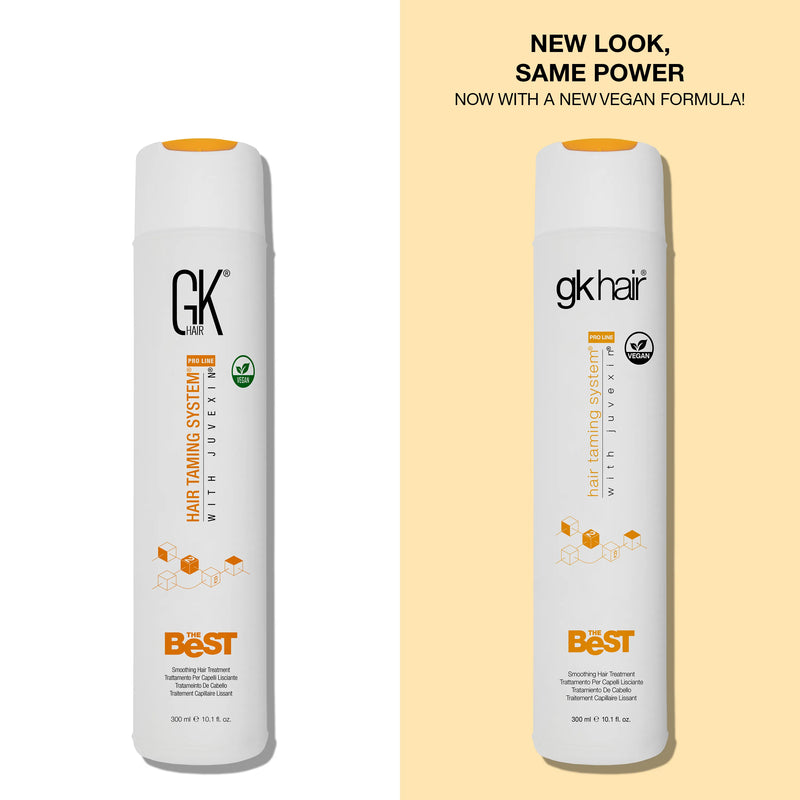
A hair keratin treatment can help replenish and smooth the hair's surface. To do this, you'll need to apply heat with a blow dryer and a flat iron for a smoother finish. If your goal is healthier-looking hair that requires minimal effort to style, then you should go for a quality hair smoothing treatment like The Best Hair Treatment. It's our #1 global best seller chosen by colorists and curl specialists for its smoothness and longevity.

Best for: all hair types, especially frizz-prone, wavy, or color-treated hair that wants smooth and a natural finish without going pin-straight.
Unlike hydrolyzed keratin which stays on the surface only, Juvexin penetrates the hair cortex while coating the cuticle. This juvexin infusion makes the brand stand out and is trusted by salons in over 75 countries. Our products are professional-grade home formulas that deliver long-lasting, smooth and shiny result.
How an At Home Keratin Treatment Differs from a Salon Treatment
If you do your keratin treatment at home, it doesn't make it any less a salon-worthy experience. If you're deciding where to begin with, then begin by gathering your keratin treatment essentials.
For instance, if you can't make it to the salon, you can follow through with the keratin treatment DIY steps and you get results that match that of the salon. Even if you have time, the cost of a keratin treatment at the salon could have you ‘breaking the bank’.
At-Home vs Salon Keratin Treatments
Whether to choose an at home keratin treatment or a salon service, it all comes down to one or more of three things: your budget, your hair type and what suits your lifestyle. If you're comparing prices of a salon or at-home treatment before making a choice, then you should know the at-home vs salon treatment cost.
In our partner salon testing 92% of clients using our Juvexin formulas reported measurable frizz reduction and improved shine retention after 5 months of regular use. Choose at-home keratin treatment if cost and convenience matter most; choose the salon option for highly textured hair and maximum longevity.
Choosing the Best At Home Keratin Treatment
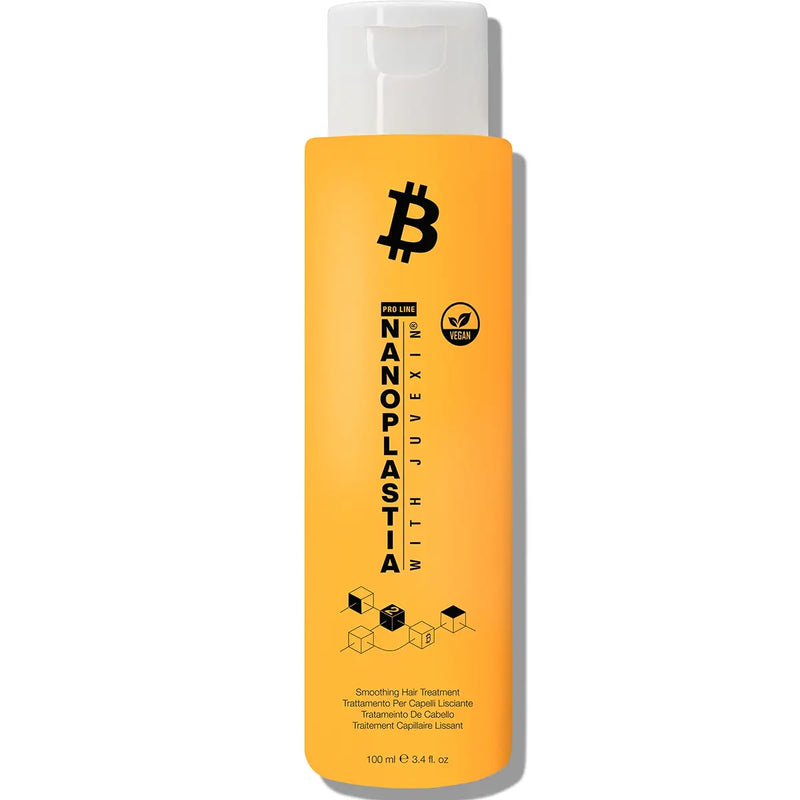
Walking into a beauty store or browsing stores online can quickly become tiring. You'll find dozens of keratin treatment products and keratin hair masks that promise salon-quality results. In reality, they don't even give results that match your hair type. Some professional grade treatment, like GK Hair Nanoplastia hair treatment has become a popular option for people who want smoother and shinier hair.
Best for: thick, curly and textured hair that needs intensive smoothing and maximum frizz control.

Before you click “add to cart” on that keratin treatment bottle, think about your hair's current condition and your hair goals.
-
Choose a smoothing treatment if your hair's main concern is humidity and frizz.
-
Choose a formula for treated hair if it is coloured or chemically processed.
-
Choose a more intensive keratin smoothing treatment at home if your hair is thick or curly. Nanoplastia Hair Treatment uses our advanced Juvexin V2 nanotechnology for intensive smoothness and shine. When you use stronger formulas, it penetrates deep into your strands and delivers ultra-sleek results with frizz control.
What's Juvexin and Why is It Exclusive to GK Hair?
Juvexin is a non-hydrolyzed protein-blend technology exclusive to GK Hair formulations. Unlike standard hydrolyzed keratin that sits on the surface, Juvexin penetrates deep into the hair's inner cortex while simultaneously coating and strengthening the outer cuticle.
Juvexin V2, our latest advancement helps amino acid bond better on textured and color-treated hair. This is why salon professionals globally recommend GK Hair treatments.
Keratin Treatment: Kit vs Individual Products?
If this is your first time doing a keratin treatment at home, you shouldn't overcomplicate it. A complete keratin treatment at home kit is almost always the better choice rather than sourcing products individually. A keratin kit usually includes a cleanser, the treatment itself and aftercare products such as shine and conditioning products.

How To Do a Keratin Treatment at Home
Now that you've chosen your treatment, the next step determines the results you get. The smooth, glossy finish that comes with a hair smoothing treatment at home comes from carefully preparing the formula, applying it evenly across your hair and following the manufacturer's instructions.
Then, set aside enough time for the process. Depending on your hair length, thickness and the product, the entire process can last between 2-4 hours.
DIY Keratin Treatment at Home: Your Required Tools Checklist
Before you begin, make sure everything you need is within reach. You don't want to stop halfway through to search for a comb.
-
Clarifying shampoo
-
Your keratin treatment or keratin treatment kit
-
Blow dryer with a nozzle
-
Flat iron
-
Fine-tooth comb
-
Wide-tooth comb
-
Hair clips to section
-
Applicator brush
-
Disposable gloves
-
Old towel
Best At-Home Keratin Products by Hair Concerns
-
For fine or wavy hair, GK Hair pH Shampoo followed by The Best Hair Treatment gives a lightweight, buildable result.
-
For thick, curly or resistant hair, pair Nanoplastia Hair Treatment with GK Hair Deep Conditioner for deeper penetration into the cortex.
-
For color-treated hair, use sulfate-free aftercare products to protect both the color and treatment.
How to do a Keratin Treatment at Home: Step-by-Step Application Process
Wash Your Hair
The first step in any keratin treatment at home is to cleanse your hair. Use GK Hair pH+ Shampoo to remove oil, product buildup, silicones and residues from previous products. This then allows the keratin treatment to penetrate the hair shaft effectively. Wash your hair once or twice, then rinse out thoroughly. You should skip the conditioner. When you want to do a keratin treatment or any treatment at all, you need clean, bare hair.
Best for: all hair types and can be used as a pre- treatment clarifying step.
Dry and Section Your Hair
Cleansing is just the start. You need to towel-dry your hair to remove excess moisture. Although on some formulas, the treatment works effectively when the hair is still slightly damp. But for most treatments, if your hair is soaking wet, the treatment may get diluted and will not work.
Then, divide your hair into small sections. Large chunks of your hair makes it difficult to work with. Use clips to divide your hair into four to six sections in order to make it easier to work on. Small sections may take longer though, but the difference is in the final result.
Apply GK Hair The Best Keratin Treatment
Put on your gloves and begin to apply the product. This is where your applicator brush comes in. Work with a section first and move from mid-lengths down to the ends. But mind the root.
Let the Treatment Process
One of the mistakes with DIY kits at home is impatience. You should allow the treatment to sit in your hair for 40-60 minutes; 40 minutes for fine or wavy hair and up to 60 minutes for thick, coarse and tightly curled hair. This period is necessary to allow the treatment bond effectively with your hair. Too long, and your hair starts getting over-processed. Too short, and the result is short-lived.
Rinse Out
Rinse out the product from your hair thoroughly with lukewarm water. You don't want to process your hair any further.
Flat Iron the Hair
Next, grab your flat iron.
-
First, set the flat iron at 410°F which is a low-medium heat setting and for standard application. For previously heat damaged and over processed hair, lower to 370°F and go even lower for weak and fragile hair.
-
Apply your heat protectant spray to damp hair.
-
Work sections by sections and glide the flat iron slowly from root to end. Smooth the tresses in small passes rather than rushing through large chunks at once.
This heat activation seals the keratin protein coat into the hair cuticle. Remember, your at home keratin treatment is a practical and simple DIY alternative to an express treatment.
But do all hair types respond the same way to keratin treatment at home? Let's see how it works for different hair types.
At Home Keratin Treatments for Different Hair Types
Keratin treatments don't work the same way for all hair types. In reality, your hair type determines the results you get and how you should apply the product. If a friend with fine, slightly wavy hair says a keratin treatment ‘didn’t do much,’ don't write the treatment off. Her hair and your thick, curly hair respond differently to the same formula, so the results vary by hair type and not product quality.
1. Brazilian Blowout for Curly Hair
A Brazilian keratin treatment at home follows the same main steps as any other formula, but the timing matters. Brazilian Blowout is a keratin treatment option but ideal for those with curly or wavy hair. To do an at-home keratin treatment for curly hair, apply a keratin treatment to your hair after cleansing, then use a blow dryer and a flat iron. This entire process doesn't tamper with your hair texture or make it pin-straight.
2. Keratin Treatment for Color-treated Hair
Don't be worried if a keratin treatment on colored hair will come out great or not, because it definitely will. You just need the right aftercare products. Little things matter here. The timing recommendation, the daily and weekly maintenance routine and lifestyle habits.
3. Keratin Treatment for Fine Hair
Even if you have the most unique hair type, you won't realize what you're missing until you explore some of the key benefits of keratin treatment on fine hair.
Stylist's Corner
Pro stylists know that timing matters. Most at-home formulas need 15-30 minutes. If you use a lesser formula, treatment won't bond.
Tips for Better Results
Consider the time you've invested getting an at home keratin treatment done, you'll realize that a few extra steps to keep the results is worth it. It's even the small habits that adds up. How soon you wash your hair, the type of shampoo used, and how often you use heat tools can be the reason why your results last for weeks and others fade after a few washes within a week.
Some Common Mistakes to Avoid
-
Rushing the process - don't apply too much or work with large sections because you're running out of time. You're doing the application yourself at home, so take your time and be patient.
-
Not waiting enough - Each product comes with its own waiting period. Some may ask you to rinse immediately after application, others may ask you to wait a while.
-
Choosing the wrong shampoo and conditioner - Sulfate-free products are recommended for treated hair.
-
Using excess heat (without protection) - Using hot tools frequently without protecting your hair will make it dry or leave it damaged.
Is An At Home Keratin Treatment Safe?
The short answer is yes, when you use a formula designed for at-home use and follow instructions carefully. You're not the only one asking. Many first time users want to know is at-home keratin treatment a higher damage risk than visiting a salon? But what makes a keratin treatment at home safe isn't the packaging but the formulation, plus it must be specially designed for home use.
Here are a few simple precautions you should take note of as well:
-
Always perform a patch test if you're using a product for the first time.
-
Work in a well-ventilated space, especially if heat activation is part of the process.
-
Follow the instructions carefully from the beginning.
-
Use the recommended heat setting.
-
Don't repeat treatment
-
Consider formaldehyde-free at-home options if that is your personal preference
What to Do If Your At Home Keratin Treatment Doesn't Work
You've followed the steps, read the guide, waited as told and yet your hair is still not as glossy and smooth as the keratin treatment before and after results of keratin treatment you've seen? We've seen it happen and it happens for various reasons.
Problem 1: Hair still looks frizzy
Cause: You likely didn't distribute product evenly or you worked with large sections at once and flat ironing wasn't effective.
Solution: Divide hair into ¼-inch sections using a fine-tooth comb. Apply product strand by strand and flat-iron each section at 350°F for 3-5 seconds from root to tip.
Our Juvexin-infused The Best Hair Treatment targets frizz control while preserving your natural wave pattern and movement. It's ideal for first-timers seeking softer, manageable finish without pin-straight results.
Problem 2: Hair feels greasy and weighed down
Cause: You used too much product and it built up.
Solution: Use a dime-sized amount for fine hair, nickel-sized for thick. If already greasy, clarify with a pH+ shampoo once a week for two weeks. A keratin treatment should leave your hair feeling smooth.
Problem 3: The results didn't last
Cause: That may be for two reasons: either you washed with a harsh cleanser or the treatment is of less quality.
Solution: Proper aftercare, washing habits determines how long at-home results last for you. Use a quality at home keratin treatment and follow instructions carefully.
Frequently Asked Questions
Can you do a keratin treatment at home?
Yes. Many keratin treatments today are designed for home use with clear step-by-step application. The key is to choose the best keratin hair treatment suited to your hair type, follow the timing and heat settings correctly, and use sulfate-free aftercare to protect the results.
How do you apply a keratin treatment at home?
You start first by clarifying with a shampoo. You section your hair and then, you apply the shampoo evenly. Ensure to follow manufacturer's instructions and don't skip any step.
Is an at home keratin treatment safe for curly hair?
Yes, as long as you use a product that's suitable for curly hair. More than that, you should follow instructions so that you don't damage your curl pattern in the process. Keratin treatment for curly hair should not make your hair pin-straight. Just glossy, smooth and less-frizzy.
How often should you do a keratin treatment at home?
Most people only need to repeat the treatment once in two to four months. How often to do your next keratin treatment depends on the products you use, the rate your hair grows, and your after-treatment routine.
Ready to Transform Your Hair at Home?
GK Hair got you for any hair transformation you're looking forward to. Whether colour treatments, nanoplastia or keratin treatments, we've got you covered on application products, aftercare products and all the tips you need to stay on top of your hair game. Ready to shop right now? Explore our Hair Treatment Collection.


Leave a Comment